Instagram offers an automatic post-scheduling feature that lets you plan Instagram posts and have them show up on scheduled days throughout the week or month.
This feature can help you spread your content across multiple platforms without dealing with a third-party app or website.
Today, we will cover how to schedule Instagram posts without third-party app.

Harness the Power of Scheduling: An In-Depth Guide on How to Schedule Posts on Instagram.
One of Instagram’s most significant pain points was its inability to schedule posts. For a long time, users have had to rely on third-party apps to do this. But with Instagram’s new feature, finally, users can schedule posts within the Instagram app.
Here’s what you need to know about scheduling posts on Instagram
- To schedule a post on Instagram, create your post as you usually would. Then, click “advanced setting”; this will take you to another section.

- At the top right corner, tap on the “schedule” button. From there, you’ll be able to choose the date and time you’d want your post to go live.
- Once you’ve done that, tap “schedule,” and your post will be saved as a draft. To view your scheduled posts, go to your profile and tap on the “scheduled” option at the top right-hand corner. From there, you can edit or delete any of your scheduled posts.
Overall, scheduling posts on Instagram is a helpful way to keep your content consistent and ensure you’re always staying top-of-mind with your followers.

Get Ahead of the Curve: A Step-by-Step Guide on How to Schedule Stories on Instagram
In-app scheduling of Stories is not possible on Instagram. However, you can schedule Instagram Stories using third-party applications like Buffer.
Buffer allows you to plan, schedule, and preview your Instagram stories so that everything is prepared for posting with just one push notification. You can also select the timeframe for submitting your Stories, storyboard articles, and draft captions.
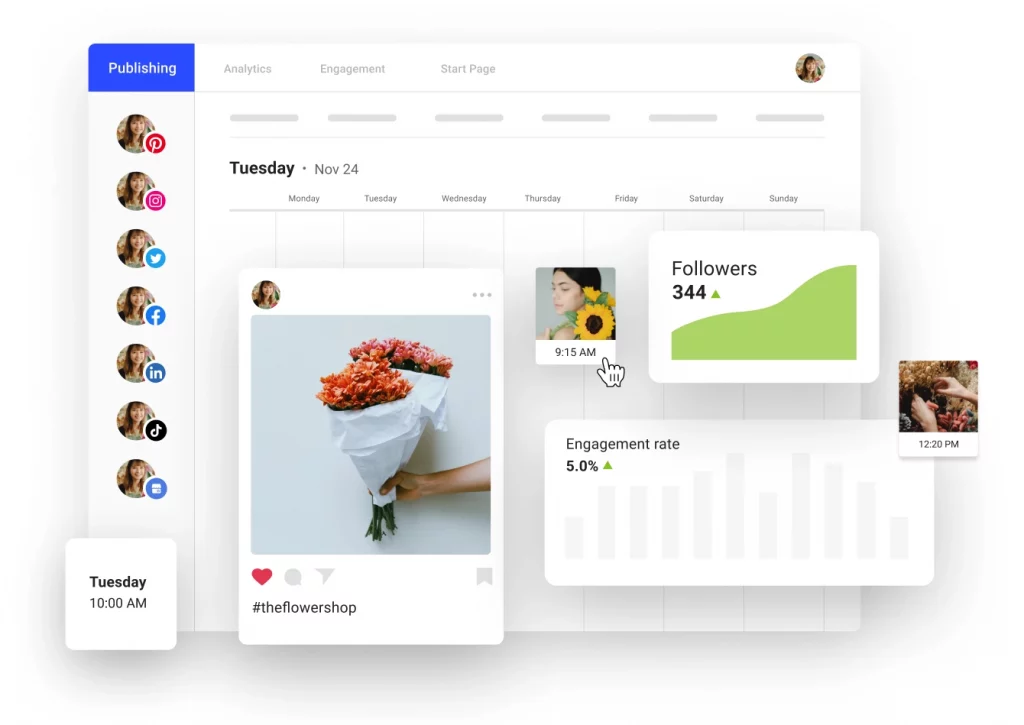
However, third-party social media scheduling systems often cannot upload stories directly to Instagram due to API restrictions. But there is a workaround, which we’ve detailed here.
Step 1: Switch to the Stories tab.
Each story has its queue in the Buffer Publish dashboard. It is accessible underneath the stories tab if your Instagram account is linked.
Step 2: Add Story
Choose “add to story” to bring up the story’s composer.
Step 3: Adding media files.
Upload your content after the story composer is open. Next, upload your story’s photos and videos by selecting “add media files.” To create an account, you may submit up to 10 image or video files.
Step 4: Format your narrative.
To conceptualise and arrange a story, simply drag and drop the desired sequence of the media files. You can crop and change each image’s location.
Step 5: Include a note in every media file.
Make notes to prepare a caption or remind yourself to include stickers, polls, music, or hashtags in the post. Your message will be saved to the clipboard for simple pasting after you receive a mobile notice from Buffer to finish the post.
Step 6: Check out your story.
To get a preview of your story, click the preview button. NOTE: When you finish posting on Instagram, each video or image can be readjusted and repositioned.
Step 7: Plan your story.
Open the time and date selector by clicking the “Schedule Story” button. Select the day and time you want to publish the story, and Buffer will provide a push notification to your phone with all the information you need to finish the Instagram post. If you currently have posts saved on your mobile device, utilising the Buffer mobile app to schedule stories is a great choice.
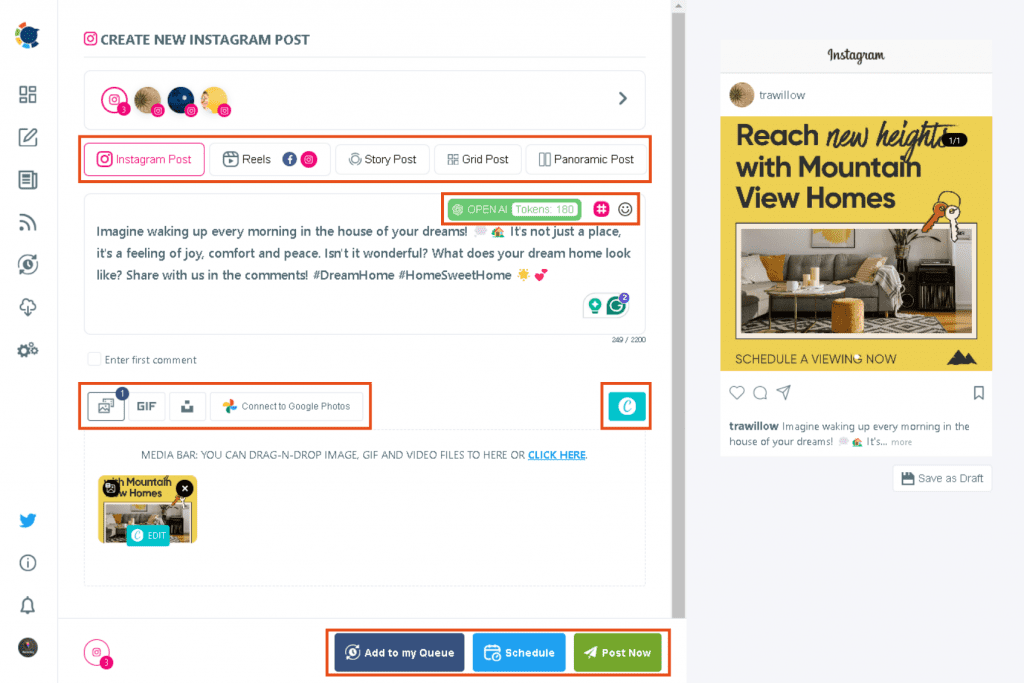
How to schedule Instagram posts with Circleboom
As an AI-powered social media management tool, Circleboom lets you design, create, share and schedule your Instagram posts, even for multiple Instagram accounts. Just follow these steps to schedule Instagram posts with Circleboom:
- Register and log in to Circleboom Publish. Then connect your Instagram Business Account.
- Proceed with Instagram posts, and pick your post type.
- Design or curate your visuals through Canva, Unsplash and Giphy stock libraries or your Google Photos. All are built-in.
- Let Circleboom’s integrated ChatGPT write your captions. You can also add emojis and hashtags, apply grammar checks, and set the tone of voice.
- When your post is ready, you can share them immediately or schedule them for later. For scheduling, you can create your own calendar or pick the best times to post on Instagram to automate your Instagram posts.
How to Schedule Instagram Posts With Multiple Photos
If you want to share multiple photos on Instagram but don’t want to spam your follower’s feeds, you can use a scheduling tool to post them for you. This way, you can control your photos’ flow and ensure they’re spaced out evenly. A few different scheduling tools are available, but one of the best is Later.
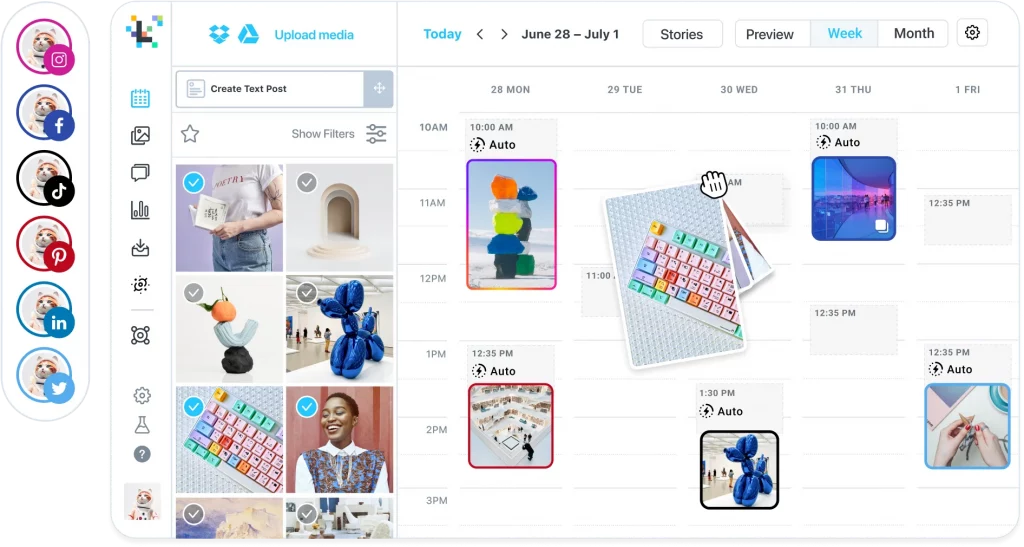
It is a free tool that allows you to upload and schedule your photos ahead of time. Once you’ve signed up for a free account, you can start creating your posts, and for each post, you can upload up to 10 photos.
Once you’ve selected your photos, you can add captions, locations, and hashtags and tag other users in your photos.
How to schedule Instagram posts on Phone by utilising Later
If you’re looking to make the most of Instagram for your business or personal brand, you need to be strategic about your posting, and that’s where “Later” comes in. Here’s how to schedule posts on your mobile device with Later.
Phone (iOS) Scheduling
- Download the Later app
- Sign up for a free Later app account
- Connect with your Instagram account
- Choose your Later plan
- Start scheduling your Instagram post: After logging into the Later app, Tap the “+” to access your Media Library.

- Click the “Create Post” button at the bottom right of the Schedule tab. Tip: You may also begin a posting by long-pressing any available period in the Calendar view.

- Choose the profile(s) you would like to schedule.
- Tap Select to select several things for the Multi-Photo post.
- Add your hashtags and captions by choosing the Saved Caption icon.

- Hit the “Change” button next to the text “No Time Selected.” Then, choose a time and date for posting.

- Tap Schedule post, or select “Save as Draft.”
How a Third-Party Scheduler Can Help You Automate Instagram Posts
If you don’t have a new scheduling feature inside Instagram yet and you don’t want to wait for it, there are third-party apps that will help, and they are:
HOOTSUITE
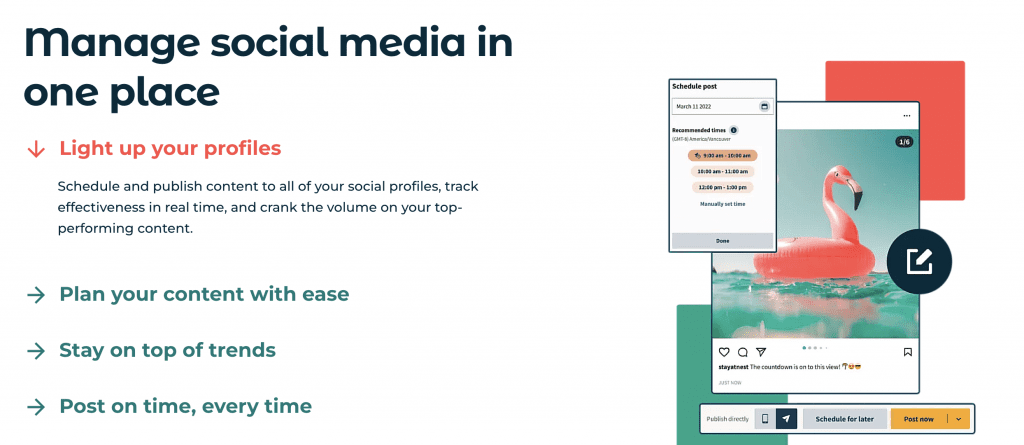
Hootsuite is a well-known Instagram scheduling application used by seasoned marketers that helps them make social media posts and preview them before scheduling. Hootsuite is not only for Instagram but also for Facebook, Pinterest, Youtube, and even Twitter users. Although widely used, it is more expensive and complicated than other Instagram publishing apps.
SOCIALPILOT
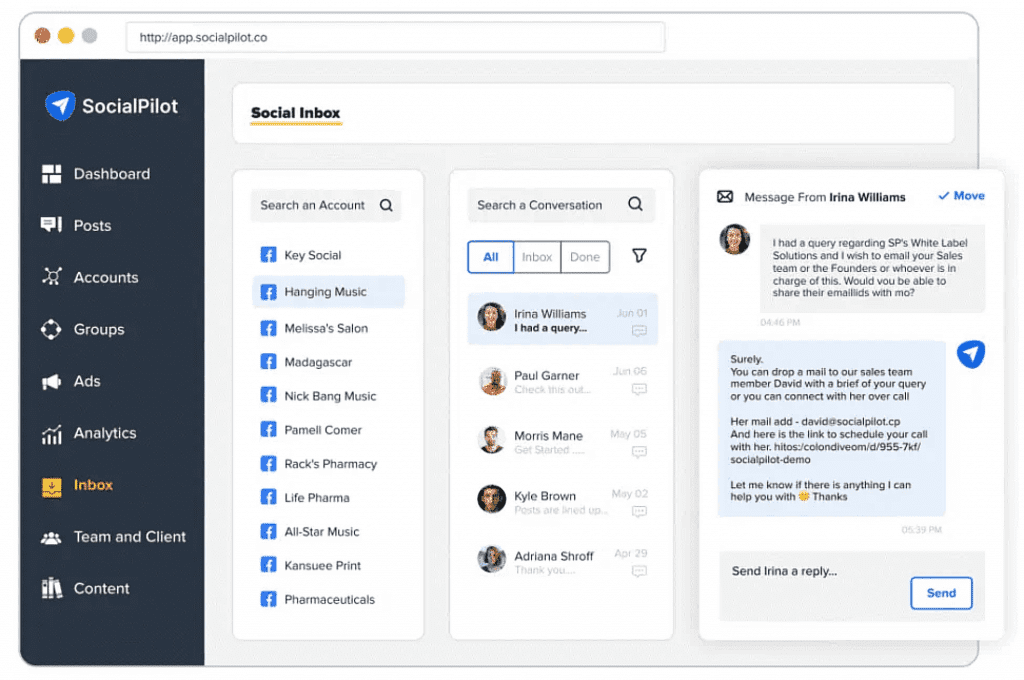
SocialPilot is, without a doubt, the best option if you’re seeking an economical yet dependable Instagram scheduling app. It is a platform focusing on solutions that combine direct Instagram scheduling with all branding components.
You can schedule Instagram reels, stories, and posts using SocialPilot because it is user-friendly and straightforward. Along with Instagram, it supports LinkedIn, Google My Business, Facebook, TikTok, Tumblr, YouTube, and Pinterest.
Final Point
This feature has been designed to make it easier for you to share, schedule your posts and grow your business on Instagram. By following this guide, you can save time, avoid the hassle of third-party apps and stay on track with your marketing strategy. Hopefully, this article has given you insight into how to schedule Instagram posts without third-party app.
Kamran Shukurlu
Kamran is a T-shaped eCommerce Digital Marketer and Content Strategist with 9+ years of experience in 30+ industries. A few of the companies that benefited from his services: Leo Burnett, Translated, Airbnb, Samsung, Huawei, etc.
Related Posts
March 24, 2025
Leveraging X’s Subscription Feature for Monetisation
March 13, 2025
Maximising Engagement with Instagram’s New DM Features
February 22, 2025
LinkedIn Polls: How to Use Audience Insights to Boost Engagement
February 12, 2025
Pinterest for Influencers: How to Monetise Your Audience
December 24, 2024
TikTok Duets and Stitch: Innovative Ways to Collaborate and Engage
December 13, 2024
Unlock viral pins with Click-Worthy Pinterest graphics
December 2, 2024
6 Ways to Perform Social Media Competitor Analysis
November 23, 2024
TikTok Advertising Best Practices
October 25, 2024
How to Use Instagram Broadcast Channels for Brand Engagement
October 11, 2024
Using Augmented Reality Filters in Social Media Campaigns
October 4, 2024
Why Instagram Is Good for Marketing: Engaging Your Audience
September 17, 2024
The Impact of Smooth Transactions on Your Brand Reputation
September 11, 2024
Building Brand Loyalty Through Private Social Media Groups
September 2, 2024
Creating Shareable Personalised Content
August 28, 2024
The Secret TikTok Viral Recipe in 2024
August 17, 2024
Harnessing the Power of User-Generated Content in 2024
August 8, 2024
Creating an Effective Social Media Content Strategy
July 18, 2024
Social SEO: Optimising Your Content for Discovery
July 8, 2024
The Comeback of Long-Form Content
June 5, 2024
How to Import Sounds From TikTok to Instagram?
May 21, 2024
9 TikTok Challenges List And TikTok Trends
February 24, 2024
Pinterest Account Suspended Appeal – How To Do It Right?
February 3, 2024
How to Make Money With Instagram Theme Pages In 2024
January 11, 2024
Resort And Hotel Digital Marketing Campaign Strategy And Ideas
December 26, 2023
New Year and Christmas Interactive Posts and Ideas For Social Media
December 8, 2023
B2B Community Management: Unpopular Opinion To Level Up
November 23, 2023
Feel Good Friday Social Media Posts And Wishes
October 6, 2023
How to Stream Games on TikTok With TikTok Stream Key
September 15, 2023
Creating an Effective Content Calendar
September 15, 2023
10 Tips to Optimize Facebook Page for SEO and Reach More People
September 4, 2023
How to Go Live on TikTok Without 1000 Followers In 2023
August 14, 2023
How Much Does IG Models Make And How To Become One
June 26, 2023
How To Get Verified On LinkedIn In 2023?
March 25, 2023
How to Create a Facebook Group Funnel to Drive Leads
March 19, 2023
How to Mass Archive Instagram Posts in 2023 + Unarchive
March 13, 2023
8 Social Media Community Building Strategies For 2023
February 18, 2023
How To Make Money On Instagram With 500 Followers
February 18, 2023
How to Go Live on LinkedIn – Best Practices and Guides
February 8, 2023
Instagram Guides Examples and Ways to Use Them
January 22, 2023
Growth Hacking for Instagram to Get More Followers in 2023
January 20, 2023
How To Upload GIFs on Twitter in 2023
January 3, 2023
What To Do When you go Viral on Instagram
December 23, 2022
How to Spy on Competitors’ Facebook Ads For Free (6 Tools)
December 22, 2022
How to Get More Views on LinkedIn – 10 Tips to Reach More People
December 19, 2022
What To Do Before and After Posting On Instagram
December 14, 2022
How Instagram Search Works: A Comprehensive Guide In 2022
November 15, 2022
Twitter Spaces Analytics: Ultimate Guide to Your Space Insights
November 13, 2022
20 Viral Instagram Reels Hooks To Keep People Watching
October 29, 2022
How To Speed Up Existing Video For Instagram Reels – FOR FREE
October 16, 2022
How to Use Twitter Advanced Search Tool on Mobile
October 16, 2022
7 Instagram Mistakes to Avoid & Here’s Why
October 9, 2022
10 Proven Instagram Story Ideas to Engage Your Audience
September 23, 2022
Social Media Shopping in 2022: What it Promises for Small Businesses
September 20, 2022
Tips to Create a Successful Hashtag Campaign
September 8, 2022
The Top 9 Instagram Tools That Can Boost Your SME’s Visibility
August 28, 2022
How to Regram: The Art of Reposting on Instagram
August 11, 2022
A Checklist to Launch a Rebrand on Social Media
August 7, 2022
The Whys and Hows of Facebook Video Ads
August 7, 2022
How To Write Good Instagram Captions
July 27, 2022
How to Plan Your Social Media Campaigns
May 4, 2022
10 Social Media Myths To Unlearn in 2022
April 11, 2022
Twitter Analytics Tools to Level Up Your Game
March 14, 2022
Monthly Social Media Updates And News – February 2022
February 23, 2022
Social Media in the times of COVID-19: Adapting to a New Normal
February 14, 2022
Monthly Social Media Updates And News – January 2022
February 2, 2022
Optimise Google My Business: An In-depth Guide to Get it Right
January 19, 2022
9 Tips to Sell on Pinterest: Your Branding And ROI Booster
January 12, 2022
Monthly Social Media Updates And News – December 2021
December 10, 2021
Risks And Dangers of Buying Instagram Followers
December 8, 2021
Monthly Social Media Updates And News – November 2021
November 2, 2021
Monthly Social Media Updates And News – October 2021
October 14, 2021
Monthly Social Media Updates And News – September 2021
October 1, 2021
Brief 18 Twitter Hacks You’ll Wish You Knew Earlier
September 23, 2021
Instagram Pre-Launch Strategy 2022: A Proper Guide for Your Product
September 14, 2021
Monthly Social Media Updates And News – August 2021
September 8, 2021
15 Social Media Post Types to Keep Your Content Engaging
September 8, 2021
How to Sell on Facebook Shops and Facebook Marketplace in 2023
August 16, 2021
Driving Traffic From Twitter Straight to Your Blog in 2022
August 13, 2021
The ABCs of Using LinkedIn Videos Like a Pro in 2022
August 11, 2021
Monthly Social Media Updates And News – July 2021
July 29, 2021
Spiral Up Your Engagements With Instagram Carousels
July 17, 2021
Monthly Social Media Updates And News – May 2021
July 5, 2021
How to Mass Delete Instagram Posts in 2022?
April 29, 2021
Monthly Social Media Updates And News: March 2021
April 17, 2021
Latest Social Media Updates And News – 2022
April 17, 2021
Monthly Social Media Updates And News: February 2021
March 31, 2021
How to Choose the Best Competitor Analysis Framework
March 1, 2021
Monthly Social Media Updates And News: January 2021
February 21, 2021
How To Get Unlimited Free Leads For Any Business In UK
February 20, 2021
How to Find Brands That Collaborate With Small Influencers
February 4, 2021
Web Content Development 101 For Small Businesses
January 28, 2021
Monthly Social Media Updates and News: December 2020
January 13, 2021
How To Add A Link To Instagram Story Without 10K Followers
December 14, 2020
6 Testimonial Examples And How To Ask For Them
December 11, 2020
IG Line Break Generator: No Need For it Anymore? (2022)
December 2, 2020
Monthly Social Media News And Updates: November 2020
April 22, 2020
Social media marketing for recruitment agencies
December 23, 2019
How to market your podcast on social media
October 31, 2019
Account-based mindset vs. lead-based marketing
October 22, 2019
The benefits of starting your own podcast
October 14, 2019
What’s the LinkedIn Social Selling Index? (and why you need it)
October 8, 2019
7 ideas to network effectively – and locally
September 26, 2019
5 tips from an influencer to unlock your potential
September 16, 2019
How to create an effective Facebook ad: 7 easy tips
September 7, 2019
3 inspiring marketing campaigns with awesome results
September 1, 2019
Everything you need to know about lead generation
August 28, 2019
Can my brand benefit from a social media calendar?
August 13, 2019
3 basics of KPIs: what to measure and why?
August 9, 2019
5 Story Highlight ideas to totally revamp your Instagram
July 31, 2019
The good, the bad, and the funnel
July 24, 2019
The basics of content marketing – why you need it
July 18, 2019
Primark – how the brand uses social media
July 10, 2019
The evolution of Twitter for social media marketing
July 7, 2019
Discover 3 benefits of WhatsApp Business!
June 28, 2019
How Lululemon uses social media: 5 ideas
June 24, 2019
New Instagram @shop and how it works
June 17, 2019
5 foolproof tools to create a buyer persona
May 29, 2019
3 burning social media trends to watch out for
May 23, 2019
7 ingredients every entrepreneur needs to have
May 13, 2019
5 Social Media Tools: Marketing Made Easy!
April 15, 2019
Wanna kickstart your landing page? 3 reliable tools!
March 26, 2019
3 video marketing tricks to boost engagement
February 26, 2019
A five-star femmepreneur – meet Gretta van Riel!
February 15, 2019
Why Twitter is essential – revamp your marketing strategy today!
February 7, 2019
SEO for Newbies: The Basics
January 22, 2019
4 amazing inbound marketing tools to try now!
January 16, 2019
Everything about ecommerce, decoded!
January 11, 2019
Influencer marketing: why is it crucial?
January 7, 2019
How social media is changing your brain
January 2, 2019
Choosing a signature colour for your brand
December 28, 2018
Advanced Instagram for startups: an effective step-by-step guide
December 1, 2018
Instagram from Scratch!
November 22, 2018
Elevate your Brand with these 4 New Linkedin Tools
January 15, 2018
5 Ways Social Media Can Help Your Small Business In 2018
September 25, 2017
7 indispensable social media tools for small businesses
September 1, 2017
September 2017: Social Media Roundup
February 2, 2017
Our new promotional video
January 17, 2017
Why your business needs to be active on social media
November 3, 2016
The Top 10 Small Fashion Brands on Instagram
September 29, 2016
Hоw Tо Grоw Yоur Smаll Business Uѕing Social Media
September 26, 2016
How can I use social media for customer service?
September 20, 2016

